In this article, we will see how to use the FlatList and SectionList components in React Native. FlatList and SectionList are two components that let us display a set of data as a list. Up to React Native version 0.43, the component used to display data as a list was ListView.
However, ListView is now deprecated in favor of FlatList and SectionList, which are simpler to use and also more performant.
To illustrate how these components are used, we will use the RandomUser API.
Let's start by creating the project
react-native init discoverFlatAndSectionList
cd discoverFlatAndSectionList/ && mkdir src
Next, we will create an index.js file in the src folder and add the following code:
import React, { Component } from 'react'
import { AppRegistry, StyleSheet, Text, View } from 'react-native'

export default class App extends Component {
  render() {
    return (
      <View style={styles.container}>
        <Text style={styles.welcome}> Welcome to React Native! </Text>
        <Text style={styles.instructions}>To get started, edit index.ios.js</Text>

        <Text style={styles.instructions}>Press Cmd+R to reload,{'\n'} Cmd+D or shake for dev menu</Text>
      </View>
    )
  }
}
const styles = StyleSheet.create({
  container: {
    flex: 1,
    justifyContent: 'center',
    alignItems: 'center',
    backgroundColor: '#F5FCFF',
  },
  welcome: { fontSize: 20, textAlign: 'center', margin: 10 },
  instructions: { textAlign: 'center', color: '#333333', marginBottom: 5 },
})
Finally, replace the code in the index.android.js and index.ios.js files with the following:
import React, { Component } from 'react'
import { AppRegistry } from 'react-native'
import App from './src'

AppRegistry.registerComponent('discoverFlatAndSectionList', () => App)
FlatList
We will start with FlatList first, then we will look at SectionList.
In the src folder, create a components folder. Inside that folder, create a UserList.js file.
Then add the following code:
import React from 'react'
import { FlatList, Text } from 'react-native'

const _renderItem = ({ item }) => <Text>{item.email}</Text>

export default UserList = props => <FlatList data={props.data} renderItem={_renderItem} />
Let's go back over the component in detail:
- We import React as well as the FlatList and Text components from React Native
- We add the _renderItem function, which lets us define how each item will be rendered in the list. For now, we simply display each user's email
- We define our FlatList
<FlatList data={props.data} renderItem={_renderItem} />The FlatList component properties are as follows:
- data: This is the list's data source; it is an array
- renderItem: This is the function used to define how to display the items
Next, to display the list, replace the code in the index.js file with the following:
import React, { Component } from 'react'
import { StyleSheet, View } from 'react-native'
import UserList from './components/UserList'

const sampleData = [
  {
    name: { title: 'mr', first: 'karl', last: 'johnson' },
    email: '[email protected]',
    picture: {
      thumbnail: 'https://randomuser.me/api/portraits/thumb/men/62.jpg',
    },
  },
  {
    name: { title: 'mrs', first: 'asuncion', last: 'gomez' },
    email: '[email protected]',
    picture: {
      thumbnail: 'https://randomuser.me/api/portraits/thumb/women/52.jpg',
    },
    nat: 'ES',
  },
  {
    name: { title: 'miss', first: 'gilcenira', last: 'ribeiro' },
    email: '[email protected]',
    picture: {
      thumbnail: 'https://randomuser.me/api/portraits/thumb/women/21.jpg',
    },
  },
]

export default class App extends Component {
  render() {
    return (
      <View style={styles.container}>
        <UserList data={sampleData} />
      </View>
    )
  }
}
const styles = StyleSheet.create({ container: { flex: 1, paddingTop: 20 } })
At first, we will not use the RandomUser API in order to keep things simple.
You should get this result:
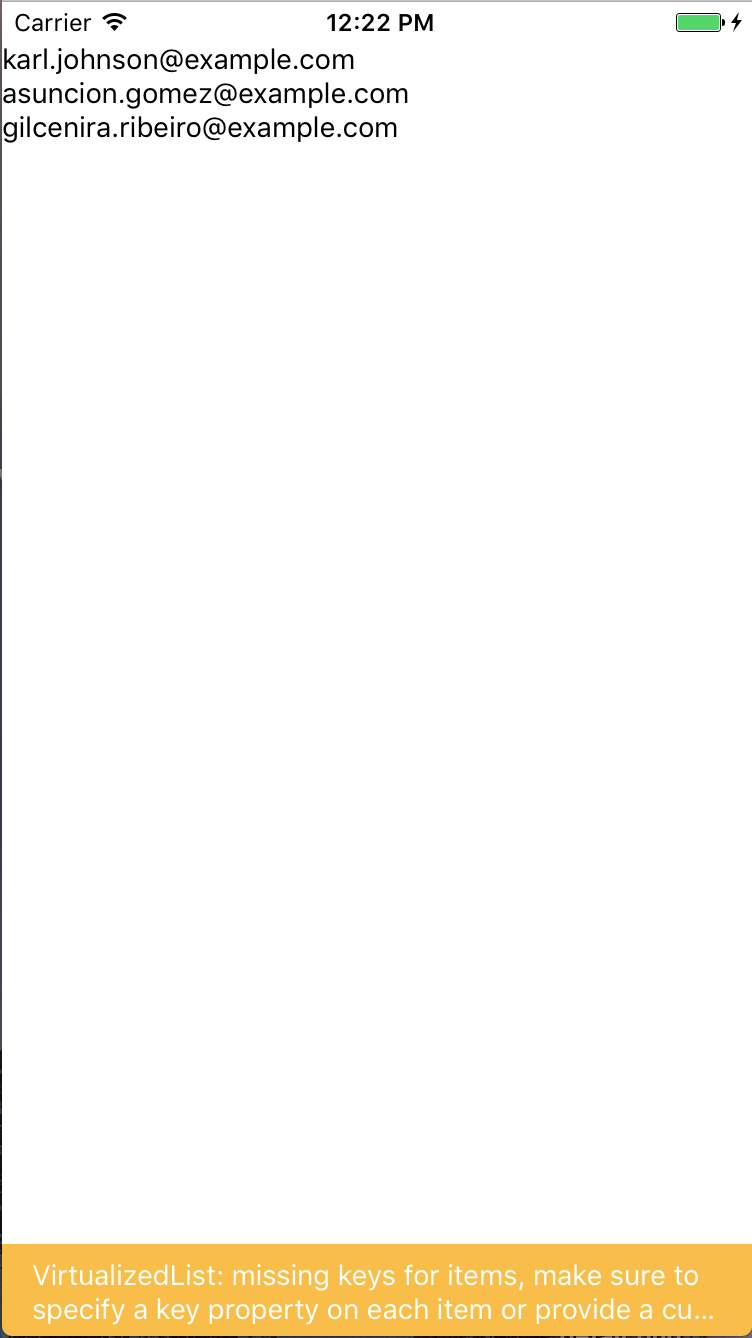
You will notice the error message at the bottom of the screen. It warns us that the list items do not have keys. The VirtualizedList component, on which FlatList and SectionList are based, needs a unique identifier for each item to improve list performance.
To work around this, FlatList has a property named KeyExtractor that lets you define which attribute of the list item should be used as the key.
<FlatList data={props.data} renderItem={_renderItem} keyExtractor={item => item.email} />We will now create the component that will be used in the renderItem method. Still in the components folder, create a file named UserRow.js and add the code below:
import React from 'react'
import { View, Text, Image, StyleSheet } from 'react-native'

export default UserRow = props => (
  <View style={styles.row}>
    <Image style={styles.picture} source={{ uri: props.picture }} />
    <View>
      <Text style={styles.primaryText}>{props.name + ' ' + props.firstName}</Text>
      <Text style={styles.secondaryText}>{props.email}</Text>
    </View>
  </View>
)

const styles = StyleSheet.create({
  row: { flexDirection: 'row', alignItems: 'center', padding: 12 },
  picture: { width: 50, height: 50, borderRadius: 25, marginRight: 18 },
  primaryText: {
    fontWeight: 'bold',
    fontSize: 14,
    color: 'black',
    marginBottom: 4,
  },
  secondaryText: { color: 'grey' },
})
Then all that remains is to import this component into the UserList component and update the _renderItem method:
import UserRow from './UserRow'

const _renderItem = ({ item }) => (
  <UserRow name={item.name.last} firstName={item.name.first} picture={item.picture.thumbnail} email={item.email} />
)
Here is the result:
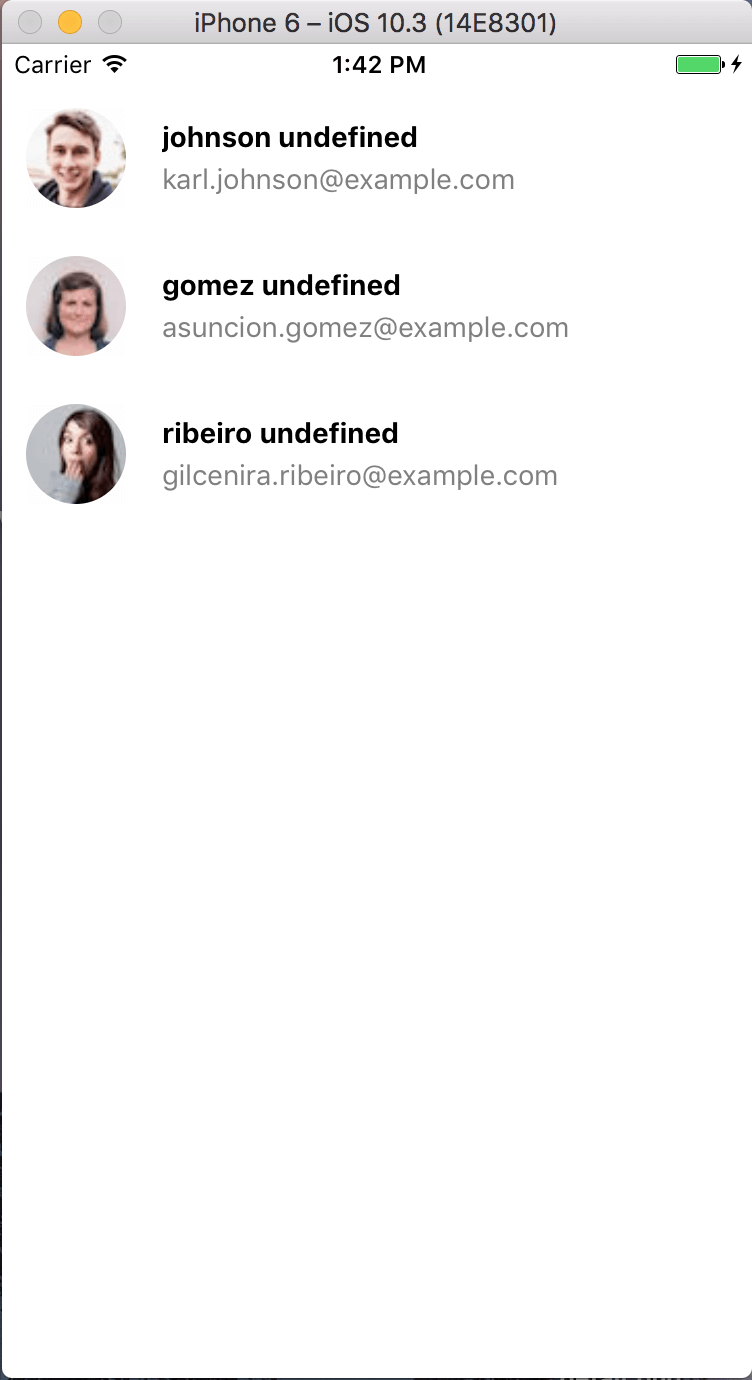
Here we can see that there is no separator between each row. If we want to add one, we have two options.
- Add a border at the bottom of the View in our UserRow component
- Use a FlatList property
We will see how to use the second solution. FlatList has a property named ItemSeparatorComponent that works in roughly the same way as the renderItem property.
We will create a function named _renderSeparator that returns the component we want to use as the separator. In our case, it will simply be a View with a few style properties:
const _renderSeparator = () => <View style={{ height: 1, backgroundColor: 'grey', marginLeft: 80 }} />Then add the ItemSeparatorComponent property to our FlatList
<FlatList
  data={props.data}
  renderItem={_renderItem}
  keyExtractor={item => item.email}
  ItemSeparatorComponent={_renderSeparator}
/>
Header and Footer
Header and Footer We can add a Header component to our list (often used for the search bar), as well as a Footer component.
To start, we will create two functions, _renderHeader and renderFooter:
const _renderHeader = () => (
  <View style={{ height: 30, backgroundColor: '#4fc3f7', justifyContent: 'center' }}>
    <Text>Header</Text>
  </View>
)
const _renderHeader = () => (
  <View style={{ height: 30, backgroundColor: '#4fc3f7', justifyContent: 'center' }}>
    <Text>Footer</Text>
  </View>
)
Here, the components displayed in the header and footer are not meaningful; the goal is simply to analyze how it works. Next, add the ListHeaderComponent and ListFooterComponent properties to our FlatList component:
<FlatList
  data={props.data}
  renderItem={_renderItem}
  keyExtractor={item => item.email}
  ItemSeparatorComponent={_renderSeparator}
  ListHeaderComponent={_renderHeader}
  ListFooterComponent={_renderFooter}
/>
EmptyComponent
It is also possible to define the component to display when the data list is empty. To do this, use the ListEmptyComponent property and define the _renderEmpty function.
const _renderEmpty = () => (
  <View style={{ height: 40, alignItems: "center", justifyContent: "center" }}>
    <Text>No results</Text>
  </View>
);

<FlatList
  data={props.data}
  ...
  ListEmptyComponent={_renderEmpty}  />
Fetching data from the RandomUser API
Before moving on to the rest of FlatList's features, we will set up data fetching from the RandomUser API.
In the index.js file, the first thing we will do is define our state
state = {
  page: 1,
  results: 20,
  totalPage: 3,
  seed: 'demo',
  isFetching: false,
  data: [],
}- page: The page we want to fetch
- results: The number of results we want per page
- totalPage: The total number of pages
- seed: The API generates random results; the seed variable lets us always retrieve the same results
- isFetching: Indicates whether we are currently fetching results from the API
- data: The results returned by the API
Next, we will create a function that returns the data and a method that updates the state:
async fetchData(page) {
  const uri = "https://randomuser.me/api/";
  const response = await fetch(`${uri}?page=${page}&results=${this.state.results}&seeds=${this.state.seed}`);
  const jsondata = await response.json();
  return jsondata.results;
}

async loadData(page) {
  this.setState({ isFetching: true });
  const data = await this.fetchData(page);
  const nextPage = page + 1;
  this.setState({page: nextPage,data: [...this.state.data, ...data],isFetching: false,});
}
Finally, all that remains is to fetch the data as soon as the component is mounted.
async componentDidMount() {
   await this.loadData(this.state.page);
}
Now that our data loads correctly, we will replace the current footer component so we have an indicator while the data is loading.
Replace the _renderFooter function in the UserList.js file with the one below:
const _renderFooter = isFetching => {
  if (isFetching) {
    return <ActivityIndicator size="large" animating={true} color="#4fc3f7" style={{ marginBottom: 12 }} />
  }
  return null
}
Next, modify the FlatList component as follows:
<FlatList
  data={props.data}
  renderItem={_renderItem}
  keyExtractor={item => item.email}
  ItemSeparatorComponent={_renderSeparator}
  ListHeaderComponent={_renderHeader}
  ListFooterComponent={() => _renderFooter(props.isFetching)}
  ListEmptyComponent={_renderEmpty}
/>
Here, the component expects an isFetching property in its list of props. This property will have the value of the application's isFetching state attribute. To do this, all that remains is to pass the property to the UserList component in the index.js file.
<UserList data={this.state.data} isFetching={this.state.isFetching} />Pagination
Currently, our data loads correctly, but only the first page of results is loaded. We will add pagination to our list. The way it will work is as follows: we will display a button in the list footer when additional results are available, and we will pass our UserList component a loadMore property, which will be used when the button is clicked to load more results, and a hasMoreResult property to know whether the button should be displayed.
To start, we will add the hasMoreResult attribute to the state; it will be passed as a property to the UserList component.
In the index.js file, add the hasMoreResult attribute to the state:
state = {
  page: 1,
  results: 20,
  totalPage: 3,
  seed: 'demo',
  isFetching: true,
  data: [],
  hasMoreResult: true,
}
Then, in the loadData method, update the value of hasMoreResult:
this.setState({
  page: nextPage,
  data: [...this.state.data, ...data],
  isFetching: false,
  hasMoreResult: nextPage <= this.state.totalPage,
})
Next, pass the properties to the UserList component:
<UserList
  data={this.state.data}
  isFetching={this.state.isFetching}
  loadMore={() => this.loadData(this.state.page)}
  hasMoreResult={this.state.hasMoreResult}
/>
Now we will modify the _renderFooter function in the UserList.js file.
const _renderFooter = (isFetching, hasMoreResult, loadMore) => {
  if (isFetching) {
    return <ActivityIndicator size="large" animating={true} color="#4fc3f7" style={{ marginBottom: 12 }} />
  }
  if (hasMoreResult) {
    return <Button color="#4fc3f7" title="Load more" onPress={loadMore} />
  }
  return null
}
Here, we have added the two parameters hasMoreResult and loadMore to our function. Then we test whether there are still results to load and return a button whose action is LoadMore.
Finally, modify the FlatList's ListFooterComponent property as follows:
ListFooterComponent={() => _renderFooter(props.isFetching, props.hasMoreResult, props.loadMore)}Pull To Refresh
To use pull to refresh on FlatList, you must first import the RefreshControl component from React Native, then add it to our FlatList.
In the UserList.js file, import the RefreshControl component:
import { FlatList, Text, View, ActivityIndicator, Button, RefreshControl } from 'react-native'Then add it to the FlatList:
refreshControl={
  <RefreshControl refreshing={props.refreshing} onRefresh={props.refresh} />
}
The RefreshControl component needs two properties:
- refreshing: A boolean that indicates whether we are currently refreshing the data; its behavior is identical to the isFetching property used earlier.
- refresh: The function to execute to refresh the data.
In our case, these two properties will be retrieved through the props of our UserList component.
So we will now modify the index.js file to pass the missing properties.
Start by modifying the state to add the refreshing attribute:
state = {
  page: 1,
  results: 20,
  totalPage: 3,
  seed: 'demo',
  isFetching: false,
  data: [],
  hasMoreResult: true,
  refreshing: false,
}
Next, we will create the refreshData method:
async refreshData() {
this.setState({ refreshing: true });
const data = await this.fetchData(1);
this.setState({page: 2,data: data,refreshing: false,hasMoreResult: true});
}
This method is roughly identical to the loadData method. However, here we pass 1 directly as the page value and update refreshing instead of isFetching.
All that remains is to pass the properties to the UserList component:
<UserList
  data={this.state.data}
  isFetching={this.state.isFetching}
  loadMore={() => this.loadData(this.state.page)}
  hasMoreResult={this.state.hasMoreResult}
  refreshing={this.state.refreshing}
  refresh={() => this.refreshData()}
/>
SectionList
We will now move on to the SectionList component. This component lets us group the items in our list by section. All the features we saw above work the same way for FlatList and SectionList. What differs is the data format, as well as a new property named renderSectionHeader, which will be used to display our section component.
Data format
To work, FlatList needs an array as its data, whether it is an array of objects, an array of strings, or something else. Each record in the array is then used as a list item.
SectionList also needs an array, but it must be an array of objects. Each object in this array is considered a section of the list. Inside each object representing a section, we will have an attribute that contains an array of objects; each of these objects is considered an item in the section. We will also need an attribute that contains the information needed by our section component.
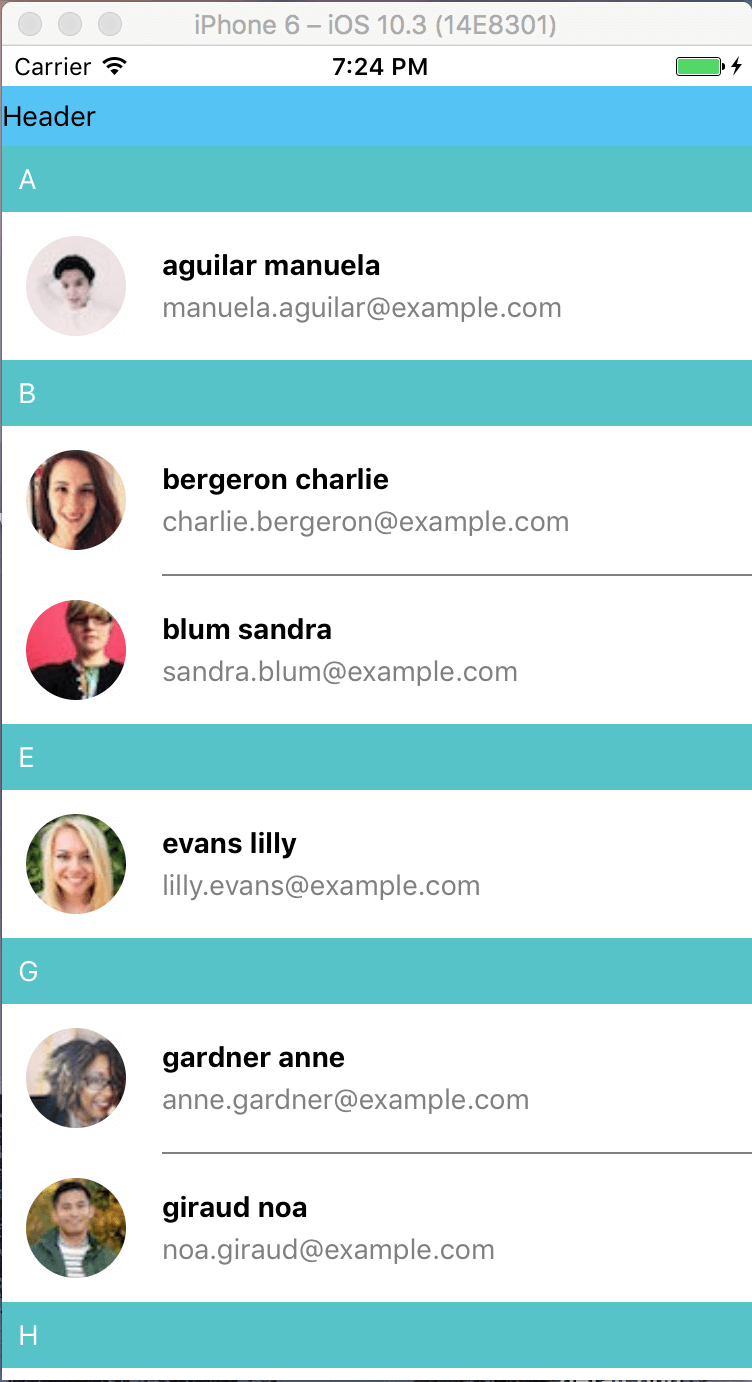
In our example, we will group the users returned by the API by the first letter of their last name. Each section will display the relevant letter.
So we will need to transform the data returned by the API. To make this task easier, we will use lodash, which makes it easy to manipulate lists and arrays.
yarn add lodashBecause what we saw previously is compatible with SectionList, we will duplicate the UserList.js file and rename it UserSectionList, then make a few changes inside it.
In the import, replace FlatList with SectionList:
import { SectionList, Text, View, ActivityIndicator, Button, RefreshControl } from 'react-native'Next, add an _renderSection function below _renderItem:
const _renderSection = ({ section }) => (
  <View style={{ padding: 8, backgroundColor: '#4fc3c8' }}>
    <Text style={{ color: 'white' }}>{section.key.toUpperCase()}</Text>
  </View>
)
Finally, replace FlatList with SectionList, rename the data property to sections, and add renderSectionHeader:
<SectionList
  sections={props.data}
  renderSectionHeader={_renderSection}
  renderItem={_renderItem}
  keyExtractor={item => item.email}
  ItemSeparatorComponent={_renderSeparator}
  ListHeaderComponent={_renderHeader}
  ListFooterComponent={() => _renderFooter(props.isFetching, props.hasMoreResult, props.loadMore)}
  ListEmptyComponent={_renderEmpty}
  refreshControl={<RefreshControl refreshing={props.refreshing} onRefresh={props.refresh} />}
/>
Now that we have created our UserSectionList component, we only need to use it in the index.js file.
Start by importing our new UserSectionList component and adding lodash:
import UserSectionList from './components/UserSectionList'
import _ from 'lodash'
Next, create a function that will transform the data returned by the API into the format expected by SectionList:
fromArrayToSectionData(data) {
    let ds = _.groupBy(data, d => d.name.last.charAt(0));
    ds = _.reduce(
      ds,
      (acc, next, index) => {
        acc.push({
          key: index,
          data: next
        });
        return acc;
      },
      []
    );
    ds = _.orderBy(ds, ["key"]);
    return ds;
 }
Here:
- We group all objects by the first letter of each lastName
- We use the reduce function, which lets us build, iteration by iteration, an array of objects containing a key attribute, which is the first letter of lastName, and a data attribute, which contains an array of objects containing only items whose first character of lastName is equal to the key value.
- We sort the results by the key value.
For more information, you can consult the lodash documentation.
Now that we have the method that formats the data, we will add it to the state:
state = {
  page: 1,
  results: 20,
  totalPage: 3,
  seed: 'demo',
  isFetching: false,
  data: [],
  hasMoreResult: true,
  refreshing: false,
  formatedData: [],
}
Then we will modify the loadData and refreshData methods to update the state with the formatted data:
async loadData(page) {
    this.setState({ isFetching: true });
    const data = await this.fetchData(page);
    const nextPage = page + 1;
    const formatedData = this.fromArrayToSectionData(data);
    this.setState({
      page: nextPage,
      data: [...this.state.data, ...data],
      isFetching: false,
      hasMoreResult: nextPage <= this.state.totalPage,
      formatedData: formatedData
    });
  }

  async refreshData() {
    this.setState({ refreshing: true });
    const data = await this.fetchData(1);
    const formatedData = this.fromArrayToSectionData(data);
    this.setState({
      page: 2,
      data: data,
      refreshing: false,
      hasMoreResult: true,
      formatedData: formatedData
    });
  }
Finally, replace the UserList component in the render method with UserSectionList:
render(){
  return(
    <View style={styles.container}>
      <UserSectionList
        data={this.state.formatedData}
        isFetching={this.state.isFetching}
        loadMore={() => this.loadData(this.state.page)}
        hasMoreResult={this.state.hasMoreResult}
        refreshing={this.state.refreshing}
        refresh={() => this.refreshData()}
      />
    </View>
  );
}
You should get this result:
We are finished with using the FlatList and SectionList components.